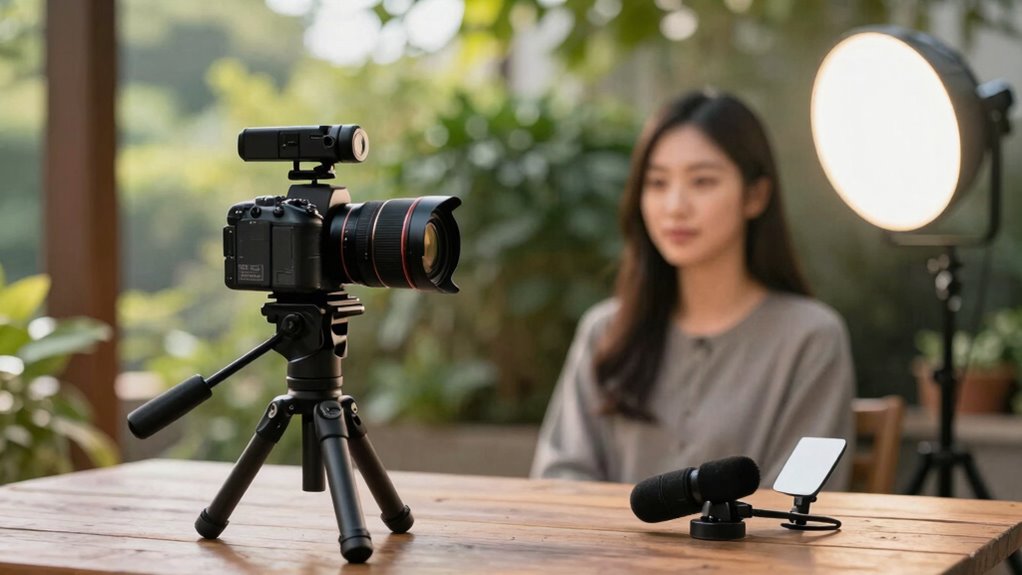
To create professional-looking interviews on the road with a single light, choose a compact LED panel or small softbox mounted on a lightweight stand. Position the light at roughly 45° and slightly above eye level to mimic natural sunlight, and use diffusers or bounce surfaces to soften shadows. Proper light placement and control are key to flattering your subject and managing space efficiently. If you want to master these techniques, keep exploring how to optimize your setup further.

Get sports gear delivered free — and shop member deals
- Fast, free delivery on millions of items
- Access to Prime Big Deal Days deals on October 6–7
- Prime Video, Amazon Music and more included
Key Takeaways
- Use compact, battery-powered LED panels mounted on lightweight stands for portability and quick setup.
- Position the light at 45° and slightly above eye level for natural, flattering Rembrandt lighting.
- Utilize reflectors or bounce surfaces to soften shadows and add dimension in various environments.
- Control light spread with diffusers and bounce cards to prevent spill and improve image quality.
- Practice quick adjustments to adapt to different locations, ensuring professional-looking interview visuals.

Have you ever wondered how to achieve professional-looking interview lighting with just a single light source? When you’re on the road, carrying minimal equipment, the key to success lies in mastering effective lighting techniques and carefully selecting the right equipment. You don’t need a full lighting kit to produce high-quality visuals—just a single well-placed light can do the job. The trick is understanding how to manipulate that light to flatter your subject and create depth, all while keeping your setup simple and portable.
Start with the basics of lighting techniques. The most common approach for single-light interviews is the classic Rembrandt lighting, where you position the light at about 45 degrees to the subject and slightly above eye level. This creates a natural, flattering triangle of light under the eye on the shadowed side, giving your subject a professional and engaging look. Alternatively, if you want a softer, more open appearance, use a diffuser or bounce the light off a reflector or nearby surface. This softens shadows and reduces harsh lines, making your subject look more approachable. The key is to experiment with the light’s distance and angle until you find a balance that emphasizes your subject’s features without flattening or overly shadowing their face. Additionally, understanding how to control light spread effectively helps optimize your setup and achieve desired results in different environments. Properly controlling light spread allows you to direct the light exactly where you want it, minimizing spill and enhancing the overall image quality.
Rembrandt lighting at 45 degrees creates a natural, professional look with flattering shadows and depth.
When it comes to equipment selection, portability and versatility are your top priorities. A compact LED panel or a small softbox mounted on a lightweight stand works best for on-the-go setups. These lights are easy to pack and quick to set up, which is crucial when working in different locations. Additionally, a sturdy reflector or bounce card can serve as a secondary tool to bounce light back onto the subject, filling in shadows and adding dimension. Battery-powered lights are particularly useful because they eliminate the need for extension cords, giving you flexibility in tight or unpredictable spaces.
Positioning your equipment correctly is crucial. Place the light at a 45-degree angle from your subject, slightly above eye level, to mimic natural sunlight and avoid unflattering shadows. Use any available surfaces—like walls or ceilings—to bounce or diffuse the light further if needed. This setup not only saves space but also enhances the quality of your lighting without additional gear.
In the end, mastering lighting techniques and carefully selecting your equipment allows you to create professional-looking interview visuals with just one light. With a little practice, you’ll be able to adapt quickly to any environment, ensuring your interviews look polished and engaging, no matter where you are.
As an affiliate, we earn on qualifying purchases.
Frequently Asked Questions
What Types of Cameras Work Best With Single Light Setups?
You’ll want cameras with good sensor flexibility and compatibility with various lighting accessories. Mirrorless cameras and DSLRs typically work best because they offer excellent camera compatibility and support for external microphones and lighting accessories. Look for models with HDMI outputs for monitoring, and guarantee they have manual controls to adjust exposure easily. These features help you optimize your single light setup, ensuring professional-quality interviews even on the road.
How Do I Prevent Shadows in Small Interview Spaces?
Shadows in small interview spaces can seem as stubborn as a mule, but you can beat them! Use a soft, diffused light close to your subject and position it at a 45-degree angle. Keep background clutter minimal to prevent distractions and guarantee good sound quality by placing microphones properly. Adjust your light and camera angles until shadows fade, and remember, a tidy background makes your video look professional and polished.
Can I Use Natural Light Instead of Artificial Lighting?
Yes, you can use natural lighting instead of artificial lighting for your interview. Natural lighting offers a soft, even glow that looks great on camera, especially near windows or outdoors. However, it can be unpredictable, so you might need to supplement with artificial lighting during cloudy days or late hours. Combining both natural lighting and artificial lighting gives you more control and guarantees consistent, professional results.
What’s the Ideal Distance Between the Light and the Subject?
The ideal distance between the light and the subject depends on your lighting placement and the effect you want. Typically, place the light about 2 to 4 feet away, angling it slightly to avoid harsh shadows. Keep your subject positioned so the light creates soft, flattering illumination without causing glare. Adjust the distance based on the light’s intensity and your desired mood, ensuring even, natural-looking coverage.
How Do I Adjust Settings for Different Skin Tones?
To adjust settings for different skin tones, start with skin tone calibration by using a gray card or a neutral background, making certain accurate color capture. Then, fine-tune your camera’s white balance and ISO to match the skin’s warmth. During color grading, enhance skin tones by subtly adjusting hue and saturation, maintaining natural appearance. This approach ensures your lighting and post-processing highlight diverse skin tones effectively.
battery-powered softbox for video
As an affiliate, we earn on qualifying purchases.
As an affiliate, we earn on qualifying purchases.
Conclusion
Think of your single light setup as a trusty lighthouse guiding your interview through the fog. Just like a lighthouse’s steady beam cuts through darkness, your well-placed light illuminates your story, making it shine brightly amidst the chaos. With a simple, smart setup, you’re in control—your own beacon of clarity. Keep it focused, keep it steady, and let your authenticity shine through, guiding your audience safely to your message’s shore.
As an affiliate, we earn on qualifying purchases.
As an affiliate, we earn on qualifying purchases.
NFL season / tailgating Picks
team gear
As an affiliate, we earn on qualifying purchases.