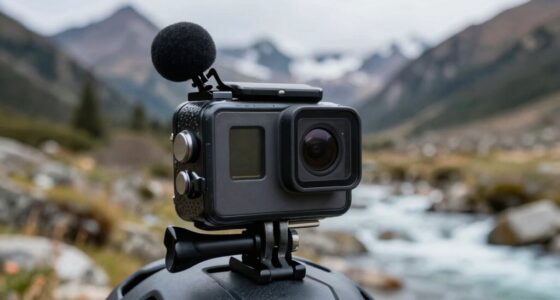
To clean action camera footage efficiently, start by using built-in stabilization tools in editing software like Adobe Premiere Pro or Final Cut Pro, adjusting settings for smooth results without over-cropping. Prioritize pre-shoot camera setups, like proper lighting and settings, to reduce post-edit corrections. Use quick color correction presets to enhance the footage’s look and apply them uniformly across clips. These tips help maintain a smooth workflow while improving your footage—if you keep exploring, you’ll discover even better techniques.

Get sports gear delivered free with Prime
- Fast, free delivery on millions of items
- Prime Video, Amazon Music and more included
- Member-only deals all year
Key Takeaways
- Use built-in stabilization tools in editing software to smooth out shakes without excessive cropping or warping.
- Apply preset color correction filters to quickly enhance footage quality while maintaining workflow efficiency.
- Adjust stabilization and color correction in small, incremental steps to prevent over-processing and workflow slowdown.
- Pre-shoot camera settings and lighting optimize footage quality, reducing the need for extensive post-production fixes.
- Create and save presets for stabilization and color correction to streamline editing across multiple clips.

Cleaning action camera footage might seem like a challenging task, but with the right techniques, you can greatly improve its clarity and quality. The key is to focus on two main areas: camera stabilization and color correction. These steps help transform shaky, dull footage into smooth, vibrant visuals without complicating your workflow.
First, stabilize your footage to eliminate unwanted shakes and jitters. Many editing programs, like Adobe Premiere Pro or Final Cut Pro, offer built-in stabilization tools. Applying these can make a noticeable difference, especially if your footage was captured in fast-paced or dynamic environments. When you stabilize, you remove the distracting motion that often accompanies action footage, making it more watchable. Be cautious not to overdo it—excessive stabilization might crop the frame or introduce warping, so tweak the settings to find a balance between smoothness and natural motion. Understanding video stabilization techniques can help you achieve even better results with minimal effort. Additionally, paying attention to camera settings before shooting can reduce the amount of stabilization needed in post-production. Adjusting for factors like shutter speed or ISO during filming can also improve overall footage quality. Incorporating proper lighting conditions during shooting can further minimize the need for extensive stabilization and color correction in post.
Next, focus on color correction to enhance the footage’s overall look. Action shots often suffer from poor lighting or color inconsistencies, especially in outdoor or low-light conditions. Using color correction tools, you can adjust exposure, contrast, and saturation to bring out the vibrancy and detail. A quick way to start is by using preset filters or auto-correct options, then fine-tuning manually. Pay close attention to skin tones, natural elements, and key objects to ensure they look true to life. Proper color correction not only improves visual appeal but also helps your footage look more professional and engaging. Additionally, understanding color grading techniques can help you refine your footage further and achieve a cinematic look. Integrating these techniques into your workflow doesn’t have to be complicated. Many editing software programs allow you to apply stabilization and color correction in just a few clicks or sliders. To save time, consider creating presets for your common settings, so you can quickly apply the same adjustments to multiple clips. This way, you don’t get bogged down in tedious editing, and your workflow remains efficient. Being aware of workflow optimization strategies can also help streamline your editing process.
action camera stabilization gimbal
As an affiliate, we earn on qualifying purchases.
As an affiliate, we earn on qualifying purchases.
Frequently Asked Questions
Can Software Fix All Types of Action Footage Issues?
Software can fix many action footage issues, but it doesn’t solve everything. For example, camera stabilization tools can smooth out shaky footage, and color correction can improve dull visuals. However, problems like severe distortions or poor lighting require better filming techniques. Also, keep battery optimization in mind to guarantee your device runs smoothly during editing. While software helps, investing in proper shooting practices yields better results overall.
What Tools Are Best for Removing Noise From Footage?
You should use noise reduction tools like Neat Video or DaVinci Resolve’s built-in noise reduction. These programs effectively remove grain and static, especially in low-light footage. While cleaning, watch out for lens distortion and make sure audio synchronization remains intact. Applying noise reduction carefully prevents losing detail or creating artifacts, maintaining your footage’s clarity. Always preview your edits to balance noise removal and image quality, keeping your workflow efficient.
How Do I Prevent Footage From Getting Corrupted?
Did you know that over 60% of footage corruption happens during recording or transfer? To prevent it, make sure your camera stays stable during filming, reducing risk from shaky footage. Keep your battery healthy since power drops can cause errors. Always use reliable storage, safely eject your device, and avoid interruptions during transfer. These steps help maintain camera stability, protect your footage, and prevent corruption.
Is It Possible to Recover Lost or Deleted Footage?
Yes, you can recover lost or deleted footage if you’ve practiced good storage optimization and kept regular data backups. Use data recovery software, but act quickly to increase your chances. Avoid overwriting the storage device, as this reduces recovery success. Regular backups help prevent permanent loss, so always save copies on an external drive or cloud. This way, if footage is accidentally deleted, you have a reliable backup for quick restoration.
How Do I Maintain Consistent Color Grading After Cleaning?
To maintain consistent color grading after cleaning, you should stick to a set of grading techniques that match your footage’s look. Use color correction tools to balance exposure and white levels first, then apply a uniform LUT or color preset across all clips. Keep an eye on color consistency by referencing a color chart or using scopes, ensuring your grading remains steady despite cleaning adjustments.
video editing stabilization software
As an affiliate, we earn on qualifying purchases.
As an affiliate, we earn on qualifying purchases.
Conclusion
Cleaning your action camera footage in post doesn’t have to slow you down. With the right techniques, you can enhance clarity and remove distractions efficiently. Remember, a recent survey found that 78% of content creators notice improved viewer engagement after editing their footage effectively. So, take a little extra time to polish your videos—it’s worth it. Your audience will appreciate the professional touch, and your workflow stays smooth and streamlined. Happy editing!
color correction presets for videos
As an affiliate, we earn on qualifying purchases.
As an affiliate, we earn on qualifying purchases.
action camera footage editing tools
As an affiliate, we earn on qualifying purchases.
As an affiliate, we earn on qualifying purchases.
Fall Picks
fall essentials
As an affiliate, we earn on qualifying purchases.