A simple two-light setup seems easy, but it’s actually tricky because balancing shadows, highlights, and color temperatures takes skill. You need to master light placement, avoid flat lighting, and create depth with just two sources. Small adjustments in angles, intensities, and diffusion can make a huge difference. If you keep exploring, you’ll discover how to troubleshoot issues and refine your technique for professional results.
Key Takeaways
- Achieving natural, flattering skin tones requires precise color temperature matching and diffusion adjustments.
- Proper light placement to create depth and avoid flat images demands careful positioning and angle control.
- Balancing contrast and preventing unflattering shadows involves nuanced adjustments of both key and fill lights.
- Managing color contrast and harmony between lights is complex, especially with limited equipment.
- Small missteps in setup can lead to unbalanced, unnatural-looking results, making the process more challenging than it appears.

2-Pack Photography Lighting Kit, NiceVeedi 25W LED Video Light Kit, 2900-7000K Dimmable Studio Light with Tripod Stand, 73" Stream Light for Video Recording
【MULTIPLE COLOR TEMPERATURE & ADJUSTABLE BRIGHTNESS】Provide 3 Color temperatures (2900K, 4800K & 7000K)to create various lighting atmosphere; This…
As an affiliate, we earn on qualifying purchases.
As an affiliate, we earn on qualifying purchases.
Why a Two-Light Setup Is More Challenging Than It Looks

While a two-light setup may seem straightforward at first, it actually presents more challenges than you might expect. One key issue is managing color contrast, which can make or break your shot’s mood. Choosing the right light color is essential; too warm or cool can clash with your subject or background. You need to balance these elements so the light color complements your scene without overpowering it. Achieving this balance involves adjusting intensity, placement, and color temperature, which can be tricky. Even small missteps in light color or contrast can lead to unflattering shadows or flat images. The goal is to create a harmonious look, but that requires careful planning and understanding of how different light colors and contrast levels work together. Understanding lighting principles can help you make better decisions and improve your overall setup.

Photography Video Lighting Kit, Upgraded Bi-Color LED Video Studio Lights with Dimmable 2500k~8500k and 79" Light Stand for Camera Photo Recording Filming Stage Shooting Streaming YouTube TikTok
【Upgraded Bi-Color】With 252 warm white LEDS, 252 cool white LEDs, this 50W LED Video Light features a max…
As an affiliate, we earn on qualifying purchases.
As an affiliate, we earn on qualifying purchases.
The Fundamentals of Lighting for Creators

Understanding the fundamentals of lighting helps you create more professional-looking content. You’ll want to take into account light placement to highlight your best features, balance color temperature for natural results, and use diffusion to soften harsh shadows. Mastering these points guarantees your setup looks polished and intentional. Additionally, considering the 3D modeling environment can help optimize how light interacts with your scene for more realistic effects.
Light Placement Strategies
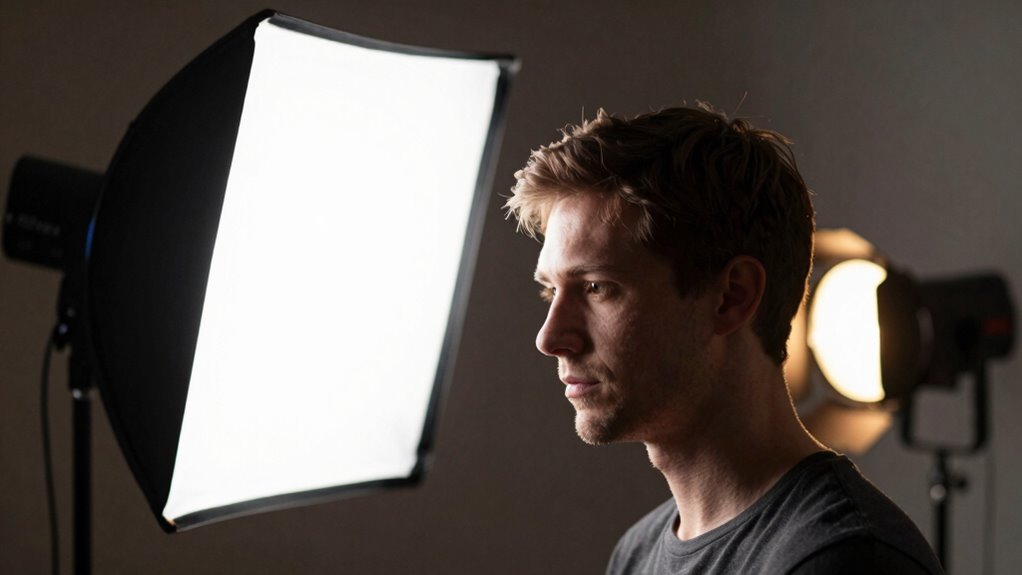
Proper light placement is essential to achieving professional-looking results with just two lights. You want to position your key light to illuminate your subject evenly, avoiding harsh shadows or lens flare that can distract viewers. Keep the light slightly above eye level and angled down to mimic natural light. Use your second light to fill shadows or separate you from the background. Think carefully about backdrop selection; a cluttered or uneven backdrop can ruin the shot, regardless of your lighting. Place the background light strategically to add depth or highlight textures without causing unwanted lens flare. Adjusting your lights’ angles and distances ensures clean, controlled illumination. With thoughtful placement, your two-light setup can produce a polished, cinematic look that’s simple yet effective.
Color Temperature Balance
Once you’ve positioned your lights effectively, balancing their color temperature becomes key to achieving a natural and cohesive look. You need to manage color contrast between your light sources to prevent unnatural skin tones or jarring visual shifts. Pay attention to Kelvin shift, which refers to the change in color temperature over time or between lights. If one light is at 5600K and another at 3200K, your subject will appear mismatched, creating an uncomfortable or distracting effect. To avoid this, match your lights closely or use gels to correct differences. Consistent color temperature ensures your scene looks harmonious, making your subject stand out naturally. Remember, even small Kelvin shifts can considerably impact the overall tone and realism of your footage. Additionally, understanding color temperature balance helps you troubleshoot lighting inconsistencies quickly and achieve professional-looking results.
Softness and Diffusion
Softness and diffusion are essential tools for creating a flattering and natural look in your videos. They help soften shadows, reduce harsh lines, and improve overall light quality. When you control diffusion, you influence the color contrast and light intensity, making your subject appear more balanced and appealing. Using a diffuser or bouncing light can achieve this effect easily. Keep in mind that increasing diffusion reduces light intensity, so you might need to adjust your light source accordingly.
- Use softboxes or diffusers to create even, gentle illumination
- Adjust diffusion levels to balance color contrast for a natural look
- Monitor light intensity to prevent over- or underexposure while softening shadows
Diffusion Film Filter Sheet 6 Packs Kit 15.7×19.6inches/ 40x50cm Lighting Gel Diffuser Roll Photography Video for Led Flash Strobe Light
Diffusion Gel Filters: Designed to alter the shadow characteristics or the beam shape of light.Itcan be used by…
As an affiliate, we earn on qualifying purchases.
As an affiliate, we earn on qualifying purchases.
Position Your Two Lights for Depth and Dimension
To create depth and dimension in your shots, you should carefully position your two lights to work together. Start by placing one light as your key, slightly above eye level, angled to highlight your subject’s features. Position the second light as a fill, lower and opposite, to add contrast without flattening the scene. Use color contrast by selecting lights with different hues or gels; this visual interest helps to separate your subject from the background. Light contrast is essential—avoid evenly lighting all sides, which flattens the image. Instead, emphasize shadows and highlights to create a sense of depth. Experiment with angles and distances to find the perfect balance that enhances your subject’s three-dimensionality. Understanding lighting contrast is key to achieving a dynamic and professional look, and incorporating lighting techniques can further elevate your results. Additionally, mastering lighting ratios is crucial for controlling how light and shadow interact in your scene.

Skytex Softbox Lighting Kit 2Pack 20x28in Soft Box | 85W 2700-6400K E27 LED Bulb Continuous Photography Lighting, Photo Studio Lights Equipment for Camera Shooting, Video Recording
The kit included: 2pcs 20" x 28"/50cm x 70cm Softbox +2pcs 85W 2700-6400K 100V-240V LED Light Bulb +…
As an affiliate, we earn on qualifying purchases.
As an affiliate, we earn on qualifying purchases.
Common Mistakes That Make Your Shots Look Flat
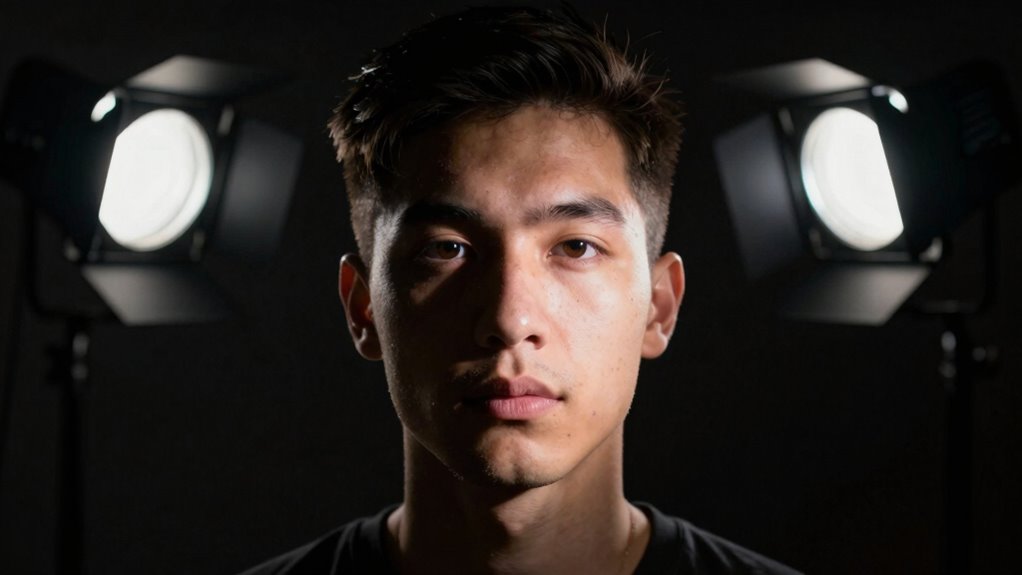
One common mistake that makes your shots look flat is evenly lighting your subject from multiple angles, which eliminates shadows and reduces the sense of depth. When you ignore light direction, your subject appears two-dimensional instead of three-dimensional. Additionally, neglecting color contrast can make your scene feel dull and lifeless. To avoid flatness, focus on controlling light direction to create shadows that add dimension. Also, consider using contrasting colors to make your subject pop. Be mindful of these pitfalls:
- Overly even lighting that removes shadows
- Ignoring the importance of light direction for depth
- Failing to incorporate color contrast for visual interest
How to Balance Shadows and Highlights for a Professional Look

Balancing shadows and highlights is key to achieving a polished, professional look in your videos or photos. Properly managed shadow contrast creates depth, while controlled highlights prevent blown-out areas. To maintain color harmony, adjust your lighting so shadows aren’t too harsh or too soft, striking a natural balance that complements skin tones and backgrounds. Use light placement and intensity to control shadow contrast, ensuring shadows add dimension without overpowering the shot. Keep an eye on highlights, making sure they aren’t overly bright or lacking detail. Consistent exposure and subtle adjustments help unify shadows and highlights, giving your footage a cohesive, professional feel. Mastering this balance elevates your visuals, making even a simple two-light setup look intentional and refined.
Choosing Light Modifiers to Improve Your Setup

Choosing the right light modifiers can make a big difference in how your photos turn out. Diffusers soften harsh light and create more even illumination, while other modifiers give you better control over light direction and intensity. By selecting the appropriate tools, you’ll enhance your setup’s flexibility and achieve more professional results. Properly managing your lighting setup also helps prevent lighting hazards, ensuring a safer environment during your creative process.
Selecting Appropriate Diffusers
Selecting the right diffuser can considerably enhance your lighting quality by softening harsh shadows and creating a more flattering, even illumination. When choosing a diffuser, consider diffuser materials that influence light dispersion, as different fabrics and plastics spread light uniquely. Some materials provide a gentle, broad diffusion, while others create a more focused, subtle effect.
To make an informed choice, look for options like:
- Translucent fabrics for soft, even light
- Opal or frosted plastics for consistent light dispersion
- Collapsible or portable diffusers for flexibility
These choices help you control light quality and achieve professional-looking results. Picking the right diffuser ensures your two-light setup delivers flattering, natural light without unwanted harshness or hotspots.
Enhancing Light Control
To improve your two-light setup, incorporating the right light modifiers can make a significant difference in shaping and controlling your illumination. Using modifiers like softboxes or grids helps manage light direction and intensity, allowing you to create precise light layering. For example, a grid can narrow the beam, increasing contrast and emphasizing subject details, while a softbox provides smooth, even light, reducing harsh shadows. Adjusting the color contrast between your key and fill lights also adds depth and visual interest. By carefully selecting these modifiers, you gain better control over how light interacts with your scene, helping you craft a more dynamic and polished look. The right combination of modifiers enables you to fine-tune your lighting, achieving professional-quality results with a simple setup.
Troubleshooting Flat or Unbalanced Lighting

If your lighting looks flat or unbalanced, it’s usually because the light source isn’t providing enough contrast or isn’t positioned correctly. To fix this, focus on adjusting the light’s position and intensity. First, check your background illumination—adding a subtle light can create separation and depth. Second, enhance color contrast by tweaking your key light’s angle to emphasize facial features or objects. Finally, make sure your light isn’t too diffuse; direct, controlled lighting helps create shadows and dimension.
- Adjust the angle of your key light to cast natural shadows
- Add a small background light to create separation
- Increase contrast with a more focused, less diffused light source
Creative Techniques With Minimal Equipment
Even with just a couple of lights, you can craft compelling visuals by getting creative with your setup. Use lighting angles and shadows to tell a story visually, emphasizing mood and emotion. Experiment with equipment versatility by positioning lights to mimic different sources, like a window or a lamp, adding depth and realism. Simple modifications—such as bouncing light off walls or ceilings—can dramatically change your scene’s tone. Focus on framing and composition to enhance your narrative without needing extra gear. These techniques challenge you to think outside the box, making the most of minimal equipment. By creatively leveraging what you have, you’ll develop a stronger sense of storytelling through light, proving that lighting techniques often lead to the most innovative results.
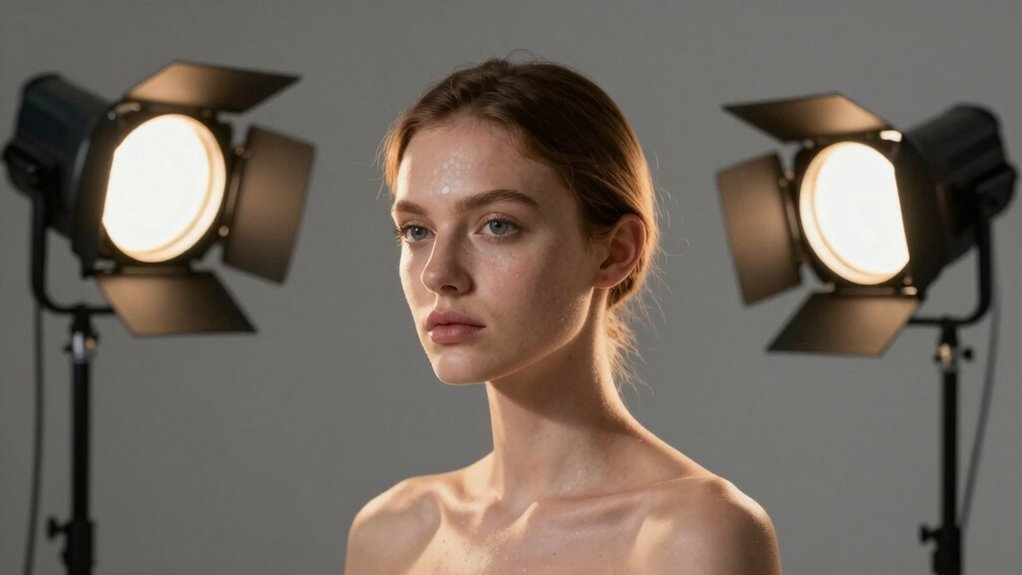
Adjusting Your Lights for Different Skin Tones and Environments

Adjusting your lighting for different skin tones and environments is essential to achieve natural, flattering results. Recognize that skin tone varies, so you need to tweak your setup accordingly. Environment adjustment is equally important—bright or dim spaces demand different lighting strategies. For example, darker skin tones may need softer, warmer lights to prevent dullness, while lighter skin benefits from more neutral or cooler tones to avoid overexposure. When adjusting your lights:
- Use warmer gels or adjust color temperature for deeper skin tones
- Modify light position or intensity based on room brightness
- Incorporate reflectors or bounce light to soften shadows
- Understanding lighting techniques helps refine your approach for consistent, professional results
These small changes help guarantee your subject looks natural, regardless of skin tone or environment, making your two-light setup versatile and effective.
Final Tips to Master Your Two-Light Lighting Setup
Mastering your two-light setup requires attention to detail and a willingness to experiment. To elevate your lighting, explore creative color schemes that add mood and depth to your shots. Use light color calibration to make sure your lights complement each other and match your scene’s tone. Don’t be afraid to tweak the hue and saturation to achieve the desired effect. Keep a consistent eye on how colors interact, especially when adjusting intensity or position. Regularly calibrate your lights to prevent color shifts, which can throw off your scene’s cohesion. Remember, small adjustments in color and placement can dramatically improve your results. Additionally, understanding lighting principles can help you create more balanced and visually appealing compositions. Practice these final tips, and you’ll develop a reliable, versatile lighting setup that enhances your creative vision.
Frequently Asked Questions
How Do I Prevent My Two-Light Setup From Looking Unnatural?
To prevent your two-light setup from looking unnatural, focus on matching their color temperature and using light diffusion. Keep both lights at similar color temperatures to avoid color shifts that cause odd looks. Use diffusers or softboxes to soften harsh shadows and create a more natural appearance. Adjust the angles and distances to guarantee even, flattering light, making your setup blend seamlessly into a natural scene.
What Are the Best Ways to Adapt Lighting for Different Subjects?
To adapt lighting for different subjects, start by adjusting the color temperature to match their skin tone or environment, ensuring natural-looking results. Use light modifiers like softboxes or reflectors to control the light’s softness and direction. Experiment with positioning to highlight features or create mood. By customizing these elements, you can achieve balanced, flattering lighting that suits each subject’s unique characteristics and the scene’s tone.
How Can I Achieve Consistent Lighting Across Multiple Shoots?
Think of your lighting setup as a musical instrument—when tuned right, it plays harmony across shoots. To achieve lighting consistency, you need to keep your equipment calibrated, ensuring every session echoes the same tone. Use the same light modifiers, keep your camera settings steady, and note your positioning. Regularly check your lights’ output, and over time, your shoots will flow seamlessly like a well-rehearsed symphony.
What Are Quick Fixes for Unexpected Shadows or Highlights?
To fix unexpected shadows or highlights quickly, adjust your lights’ color temperature to match ambient lighting, ensuring consistency. Use light diffusion tools like softboxes or reflectors to soften harsh shadows and highlights, creating a more even look. If shadows persist, try repositioning your lights or adding a bounce to fill in darker areas. These quick fixes help maintain a balanced, professional appearance without extensive setup changes.
How Does Room Size Affect My Two-Light Setup Choices?
Room size greatly impacts your two-light setup because larger spaces may require stronger or additional lights to fill the area evenly, while smaller rooms can cause harsh shadows due to limited space. Room acoustics also matter; echoey spaces can distort sound, so consider acoustic treatment. Additionally, natural light behaves differently in various room sizes—big rooms may need diffusers or reflectors to balance daylight with artificial lighting effectively.
Conclusion
Mastering a two-light setup might seem simple, but it’s a delicate dance that can make or break your shot. With the right positioning, balancing shadows, and avoiding common pitfalls, you’ll gain access to a professional look that turns ordinary into extraordinary. Think of your lights as the brushstrokes of a masterpiece — when perfectly controlled, they create a visual symphony that leaves viewers in awe. Keep practicing, and soon you’ll be a lighting wizard transforming every scene effortlessly.