To avoid ruining your action videos with poor audio, focus on minimizing background noise and properly positioning your microphone. Keep your mic close to the sound source, use windshields, and monitor levels during filming to catch issues early. Managing ambient sounds and soundproofing your environment also makes a huge difference. Proper post-production editing can further clean up your audio. Stick with these tips, and you’ll find out how to achieve clear, professional sound that elevates your videos.
Key Takeaways
- Poor microphone placement and distance can cause muffled or distorted audio in action videos.
- Background noise and environmental interference often overshadow main sounds, reducing clarity.
- Ignoring audio levels and monitoring leads to clipping or inaudibility during recording.
- Inadequate wind protection or soundproofing results in harsh noise and echo issues.
- Failing to edit and clean audio in post-production leaves unwanted noise and imbalanced sound quality.

RØDE VideoMic GO II Helix | Ultra-Compact On-Camera Shotgun Microphone with Both 3.5mm and USB Outputs for Filmmaking, Content Creation, Podcasting and Video Calls (3rd Gen)
The VideoMic GO II is a compact, lightweight, easy-to-use shotgun microphone for capturing professional quality audio with ease
As an affiliate, we earn on qualifying purchases.
As an affiliate, we earn on qualifying purchases.
Common Mistakes That Ruin Your Action Video Audio
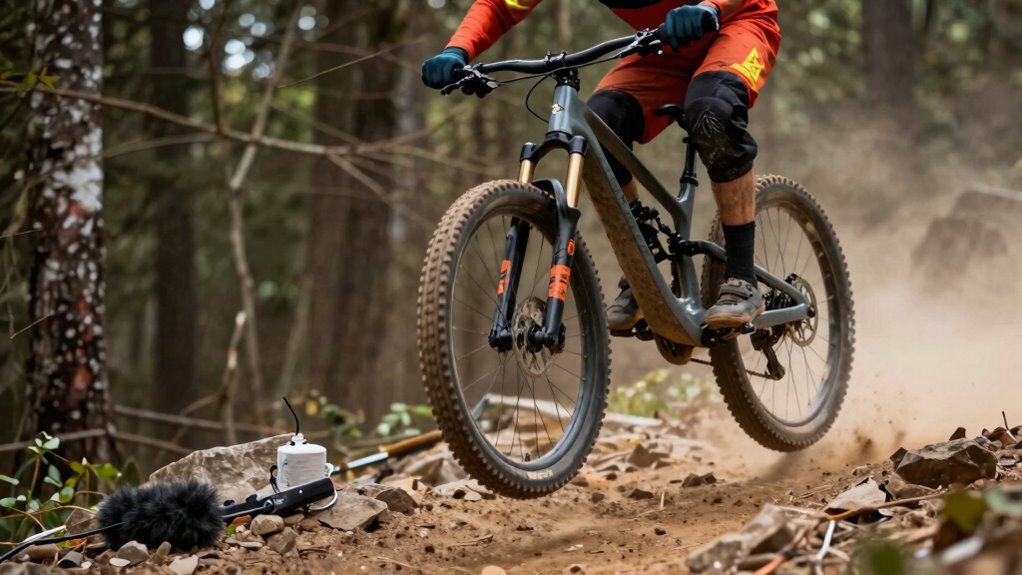
When filming action videos, poor audio quality can quickly ruin the viewer’s experience, even if the visuals are perfect. One common mistake is neglecting how camera angles affect sound. Shooting from a distance or at awkward angles can make audio faint or distorted, losing important detail. Additionally, improper lighting techniques can create unintended noise or interfere with your microphone’s ability to capture clear sound. For example, harsh lighting setups might cause equipment to overheat or produce unwanted hums. Always make certain your camera angles keep the microphone close to the action, and use lighting techniques that minimize noise and interference. Being aware of audio interference and how it impacts your recordings can help you troubleshoot issues before they become problematic. Proper sound capture techniques are crucial for maintaining high-quality audio in action videos. Paying attention to these elements helps you avoid audio mishaps and keeps the focus on your exciting footage, especially when considering background noise that can compromise clarity. Additionally, understanding how environmental factors influence sound can help you prepare better for different filming conditions. Recognizing the importance of acoustic environment can further improve your audio quality in various settings.

Deity W01 Deluxe Short-Haired Windshield for S-Mic 2 and 3 with Internal Rubber Gasket, Withstands Wind Speeds of Up to 15 Km Per Hour (Black)
Delivers Pristine Sound Quality: The Deity W01 Short-Haired Windshield upgrades your audio recording setup and is designed to…
As an affiliate, we earn on qualifying purchases.
As an affiliate, we earn on qualifying purchases.
Why Background Noise Is Your Enemy During Recording
Background noise can sabotage your audio recording by masking the main sounds you want to capture. In silent environments, even minor background sounds become noticeable, making it hard for viewers to focus on the action. Wind interference is especially problematic outdoors; it creates a harsh noise that drowns out dialogue and important sounds. When recording in noisy settings, your audio quality suffers, and you risk losing essential details. To avoid this, choose quiet locations whenever possible, and be mindful of environmental factors like wind. Using windshields or dead cats on microphones can help reduce interference. Remember, clean audio is essential for engaging action videos, so controlling background noise is a vital step in your recording process. Proper microphone placement and soundproofing techniques can further improve your audio quality. Being aware of metaphysical concepts like energy and environment can also help you select the best recording conditions. Additionally, understanding the impact of environment on sound can guide you in optimizing your recording setup for clarity and precision. Paying attention to acoustic properties of your recording space can make a significant difference in capturing clear audio. Recognizing the influence of surroundings on sound behavior can help you create the optimal environment for recording.
![WavePad Audio Editing Software - Professional Audio and Music Editor for Anyone [Download]](https://m.media-amazon.com/images/I/B1fcLEGCs6S._SL500_.png)
WavePad Audio Editing Software – Professional Audio and Music Editor for Anyone [Download]
Full-featured professional audio and music editor that lets you record and edit music, voice and other audio recordings
As an affiliate, we earn on qualifying purchases.
As an affiliate, we earn on qualifying purchases.
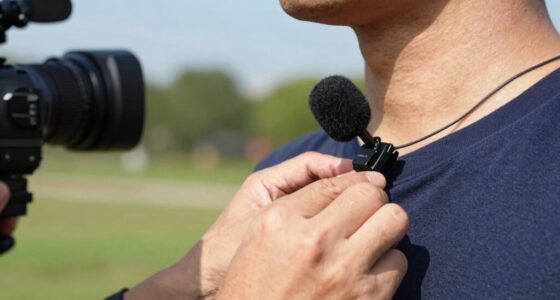
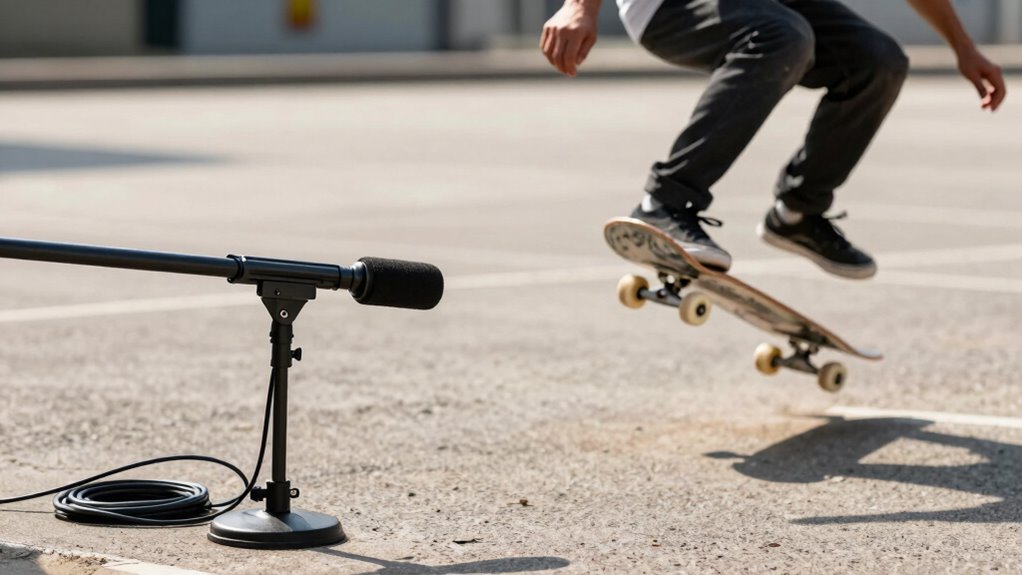
How to Properly Position Your Microphone for Clear Sound

Proper microphone placement can make a significant difference in the clarity and quality of your audio. Position your microphone close to the sound source, ideally about 6-12 inches away, to capture clear sound and minimize background noise. Use wind protection, such as a windscreen or foam cover, to prevent wind noise and plosives from ruining your audio. Keep the microphone at an angle that avoids direct airflow from your mouth or environment, reducing unwanted sound distortion. Adjust the height based on the subject and shooting context for ideal results. Here’s a quick guide:
| Microphone Placement | Wind Protection |
|---|---|
| Close to the source | Use a windscreen or foam cover |
| Angle away from airflow | Shield microphone from wind |
| Maintain consistent distance | Prevent wind noise |
| Adjust height for clarity | Use additional wind barriers |

Focusound 52 Pack Acoustic Foam Panels 1" x 12" x 12" Sound Proof Foam Panles Soundproofing Noise Cancelling Wedge Panels for Home Office Recoding Studio with 300PCS Double-Side Adhesive
Soundproofing – Acoustic foam panels triangular grooves structure for better noise absorption, helps to reduce and absorb unwanted…
As an affiliate, we earn on qualifying purchases.
As an affiliate, we earn on qualifying purchases.
Understanding and Managing Audio Levels During Shooting

You need to keep a close eye on your audio levels during shooting to avoid recordings that are too quiet or distorted. Monitoring your levels helps you catch issues early, while adjusting microphone settings guarantees consistent sound quality. Staying attentive to these points will save you time in post-production and improve your overall audio.
Monitoring Audio Levels
Monitoring audio levels during shooting is essential to guarantee clear and balanced sound. You should keep an eye on your meters to prevent clipping or inaudibility. Use headphones to catch issues early, and adjust your gain accordingly. Remember, proper audio compression helps maintain consistent loudness, avoiding sudden spikes. Incorporating sound branding subtly can confirm your audio’s signature doesn’t overpower dialogue or effects. Additionally, understanding audio quality factors can help you achieve professional-sounding results. Being aware of digital audio interfaces and how they influence sound quality can further improve your recordings.
Adjusting Microphone Settings
Adjusting microphone settings is a crucial step in managing audio levels during a shoot. Proper microphone placement ensures you’re capturing clear sound without background noise or distortion. Position the mic close to your subject, but avoid obstructing their movement or field of view. During audio calibration, test your setup by recording a short clip and listening carefully. Adjust levels so they’re not too high (which causes clipping) or too low (resulting in weak audio). Use your recorder’s meters to monitor the sound; aim for peaks around -12 to -6 dB. Remember, fine-tuning your microphone placement and settings throughout the shoot helps maintain consistent audio quality. Taking these steps reduces the risk of audio mistakes that can ruin your action videos. Additionally, understanding audio levels and regulations can help you avoid common issues and ensure your recordings meet industry standards. Being familiar with sound calibration techniques can further enhance your audio quality and prevent issues during post-production.
How Excess Ambient Sound Can Distract From Your Action Shots
Excess ambient sound can easily overpower your action shots, making it hard to hear key details. When environmental noise dominates, your voice can become unclear or lost altogether. This distraction can pull viewers’ focus away from the action itself, diminishing the impact of your footage. Incorporating inspiring quotes or positive expressions can help motivate you to improve your audio quality and stay focused during filming. Paying attention to sound levels and using external microphones can also significantly reduce unwanted background noise. Additionally, understanding how to manage background noise levels is crucial for capturing clear and compelling footage.
Overpowering Environmental Noise
Have you ever noticed how loud, background noise can drown out the main sounds in your footage? Environmental interference, like wind noise, can overpower your action shots and make audio unclear. This distraction pulls viewers away from the excitement you’re trying to capture. To combat this, consider these tips:
- Use windshields or dead cats on your microphones to reduce wind noise.
- Choose filming locations with less environmental interference, like sheltered areas.
- Monitor audio levels constantly to catch sudden environmental noise spikes early.
- Incorporate smart audio equipment that automatically adjusts sound levels to maintain clarity.
Loss of Voice Clarity
When environmental noise isn’t managed properly, your voice can become muffled or overshadowed, making it hard for viewers to understand what’s being said. Excess ambient sound can drown out your voice, causing a loss of voice clarity. To combat this, focus on proper voice modulation—adjusting your tone and volume to stay clear over background noise. Using audio compression wisely helps keep your voice consistent, preventing sudden dips in volume that can make it hard to hear. Be mindful of how ambient sounds interfere with your speech, and always check your audio levels during recording. Clear, well-modulated voice combined with controlled audio compression ensures your message comes through loud and clear, even amidst noisy action scenes.
Distraction From Action
Background noise can easily distract viewers from your action shots, making it harder to focus on the main event. Excess ambient sound creates visual distraction, pulling attention away from the core action and reducing viewer engagement. To improve, consider these tips:
- Use directional microphones to isolate your subject and cut down on background noise.
- Control your environment by filming in quieter locations or during less busy times.
- Apply noise reduction in post-production to minimize distracting ambient sounds without sacrificing clarity.
- Incorporate entertainment content to better understand how sound quality impacts viewer perception and engagement. Recognizing the importance of sound quality in storytelling can help you create more engaging action videos.
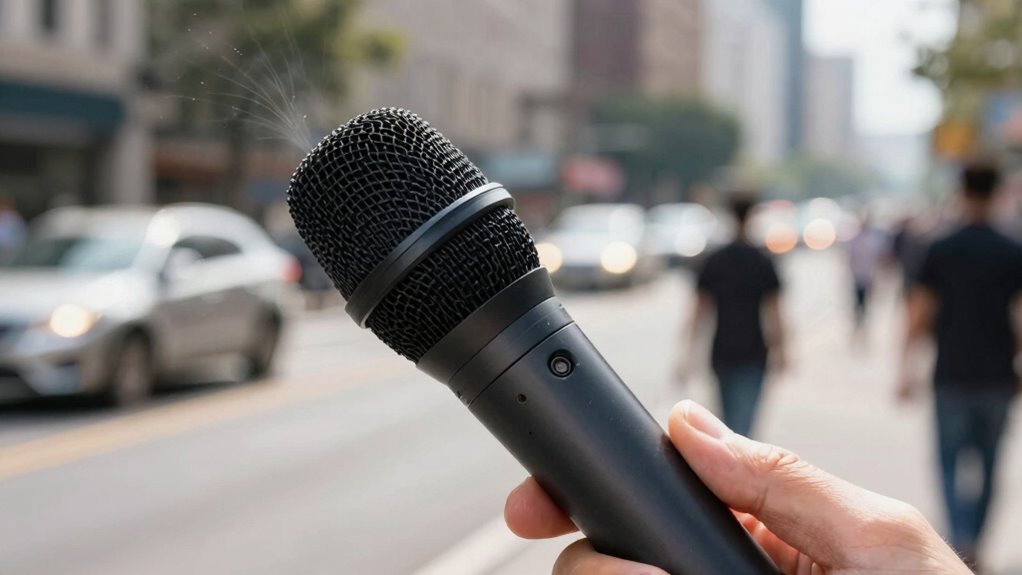
Choosing the Right Microphone for Action Videos
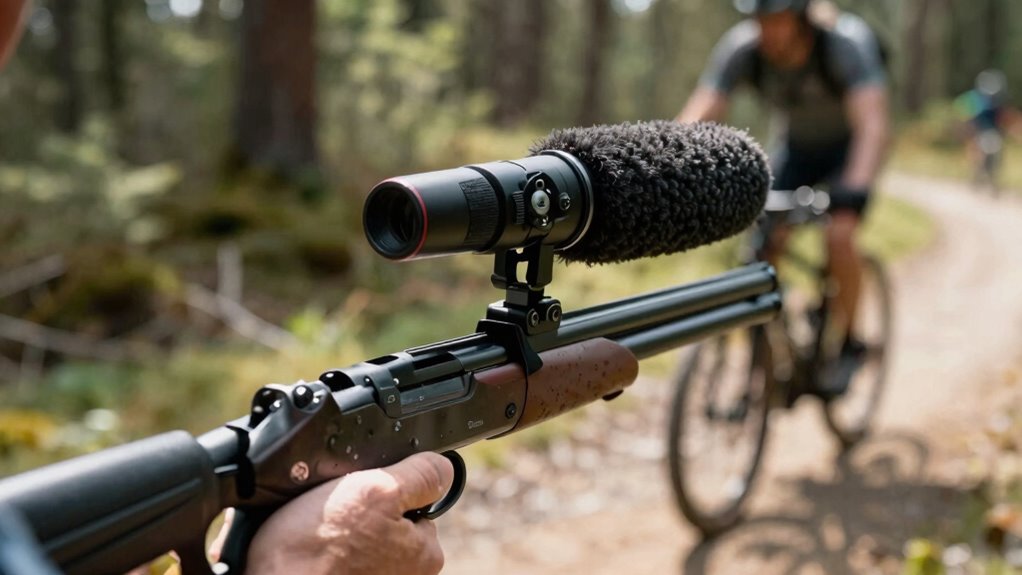
Choosing the right microphone for action videos is essential because capturing clear, high-quality audio amidst loud surroundings can make or break your footage. Microphone types vary, so consider your environment and recording needs. If you’re filming outdoors or in noisy places, a shotgun mic offers directionality, helping you focus on the subject and cut background noise. For handheld or on-the-go shots, lavalier microphones are discreet and provide consistent audio. Using the right audio accessories, like windshields or shock mounts, can further improve sound quality by reducing wind noise and handling sounds. Selecting the appropriate microphone type and accessories guarantees your audio complements your visuals, making your action videos more immersive and professional.
Monitoring Your Audio Live: Tips to Catch Problems Early

To catch audio issues early, you should perform regular sound checks before and during your recording or event. Always use headphones to monitor live sound, so you notice problems immediately. Monitoring in real-time helps you make quick adjustments and prevent issues from going unnoticed. Additionally, understanding audio signal flow can help you troubleshoot problems more effectively. Being familiar with your audio equipment setup allows for more accurate identification of potential issues as they arise. Familiarity with sound levels and how they fluctuate can also prevent distortion or clipping during recording. Regularly reviewing your monitoring techniques can further enhance your ability to detect and address problems promptly.
Regular Sound Checks
How often should you check your audio during a live event? Regular sound checks are essential to maintain sound consistency and catch issues early. Ideally, you should monitor your audio at key points, such as before the event starts, during changeovers, and periodically throughout. This helps guarantee equipment calibration stays accurate and sound quality remains steady.
To stay on top of things:
- Perform quick checks during setup and breaks to confirm levels and clarity.
- Listen for any unusual noises or drops in volume that could signal equipment issues.
- Adjust as needed to keep audio balanced and clear.
- Regularly review equipment performance to ensure all components are functioning properly.
Consistent monitoring prevents small problems from escalating, keeping your action videos professional and engaging.
Use Headphones Consistently
Using headphones consistently is one of the simplest ways to catch audio problems early during a live event. Regularly wearing headphones helps you notice issues like audio distortion, background noise, or imbalance before they escalate. Keep headphone hygiene in mind—clean your gear regularly to prevent ear infections and maintain sound clarity. Consistent use also aids in audio calibration, ensuring your monitoring remains accurate.
| Tip | Benefit |
|---|---|
| Use the same headphones | Maintains consistent sound quality and familiarity |
| Clean headphones | Prevents hygiene issues and audio contamination |
| Calibrate regularly | Ensures accurate audio monitoring |
Sticking to these practices improves your ability to detect issues promptly, saving you from costly mistakes later.
Monitor in Real-Time
Monitoring your audio in real-time is the most effective way to catch issues as they happen. It helps you identify problems like audio calibration errors or poor microphone placement before they ruin your footage. To do this effectively, use quality headphones that reveal all sound details. Keep these tips in mind:
- Regularly check your audio levels to make sure they’re neither too high nor too low.
- Confirm your microphone placement is ideal, avoiding unwanted noise and echo.
- Listen for inconsistencies or distortion that could indicate calibration issues or equipment malfunction.
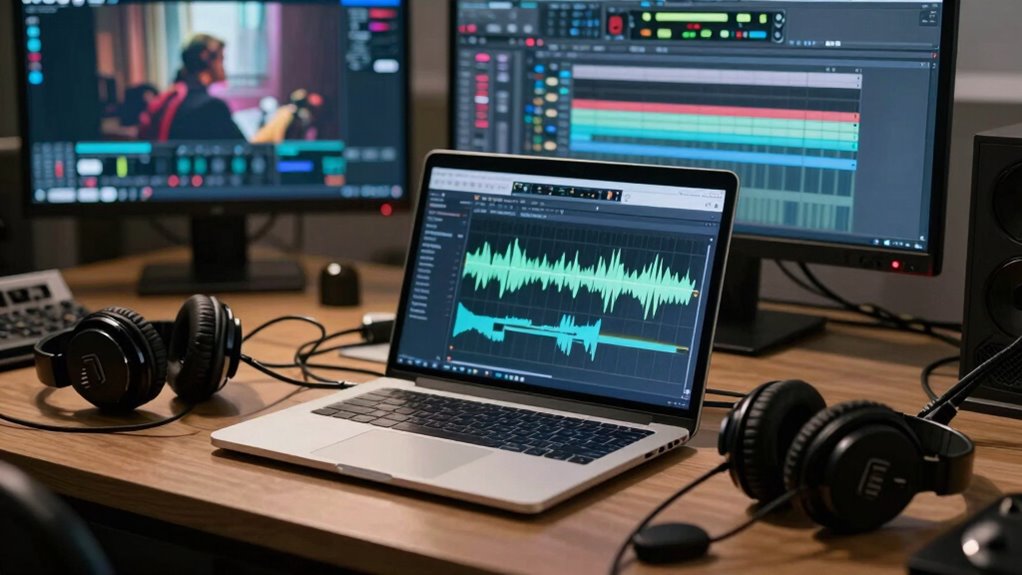
Fixing Echo and Reverb in Post-Production
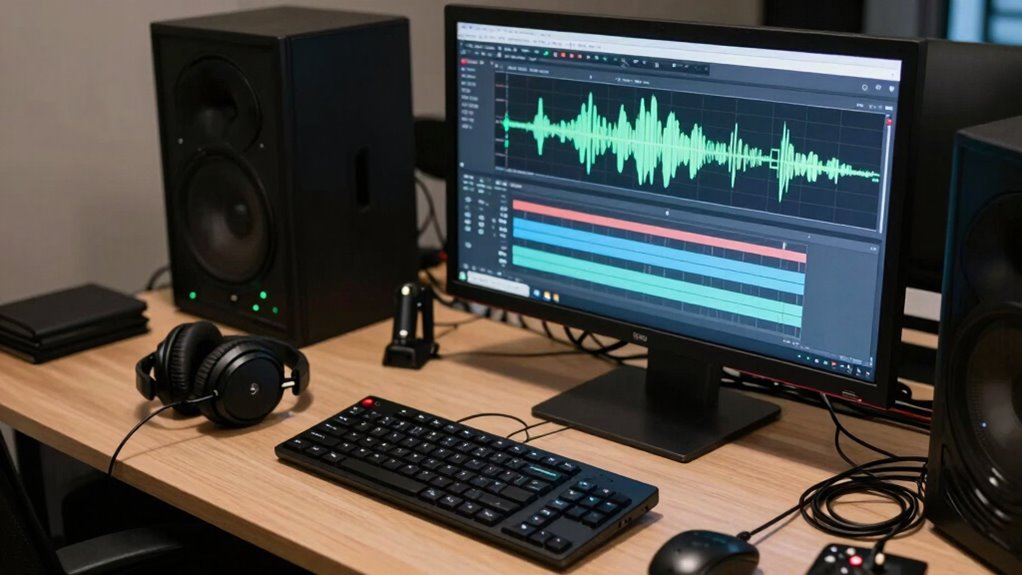
Echo and reverb can be tricky to eliminate once recorded, but post-production offers effective tools to reduce their impact. To achieve better audio clarity, focus on echo reduction techniques that target unwanted reflections. Use equalization (EQ) to cut frequencies that emphasize reverb, especially in the mid and high ranges. Reverb control plugins are essential—they help diminish the tail of reverb, making the audio sound cleaner. De-echoing tools can also analyze the sound and isolate echo components for reduction. Be careful not to over-process, as it can make the audio unnatural. Always listen critically after applying these adjustments. Properly managing echo and reverb during post-production improves overall audio quality, ensuring your action videos sound professional and immersive.
Simple Post-Processing Tricks to Improve Audio Quality
Once you’ve tackled echo and reverb issues, the next step is to implement simple post-processing tricks that can instantly boost your audio quality. First, focus on music selection—adding background music that complements your footage enhances emotional impact and masks minor imperfections. Second, use equalization (EQ) to clean up your audio, reducing hums or rumbling sounds, and emphasizing clarity. Third, consider color grading your video to match audio mood; cooler tones can create tension, while warmer tones evoke excitement. These small adjustments can make a significant difference, making your action videos sound more professional and immersive. Remember, clean audio paired with thoughtful music and visual color grading creates a seamless experience for viewers.
Best Practices for Capturing Crisp, Professional Sound in Action Footage
Capturing crisp, professional sound in action footage starts with choosing the right equipment and setup. Use high-quality microphones suited for your environment, such as shotgun mics for directional focus. Implement soundproofing techniques like foam panels or blankets to reduce ambient noise and echoes, ensuring cleaner recordings. Position your microphones close to the action but out of frame to maximize clarity. After filming, leverage audio editing software to fine-tune your recordings, removing unwanted noise and balancing levels. Always monitor audio levels during recording to prevent clipping. Proper soundproofing and equipment choices set a solid foundation, while editing software helps refine the audio, resulting in professional, crisp sound that enhances your action videos.
Frequently Asked Questions
How Can I Prevent Audio Clipping During Fast-Paced Action Scenes?
To prevent audio clipping during fast-paced action scenes, you should carefully manage your audio gain and monitor the dynamic range. Keep your gain levels low enough to avoid distortion, especially during loud moments. Use a limiter or compressor to control peaks and maintain a consistent volume. Regularly check your audio levels with meters, and adjust your settings as needed to guarantee you capture clear sound without exceeding the dynamic range.
What Are the Best Ways to Protect Audio Equipment in Outdoor Environments?
You need to keep your gear safe from the unpredictable outdoors. Weatherproofing gear is your first line of defense—use waterproof covers, rain shields, or specialized bags. Never leave equipment exposed; store it securely in waterproof cases or padded storage solutions when not in use. Stay vigilant—moisture, dirt, and sudden weather changes can strike unexpectedly, so always be prepared to protect your audio equipment and keep it functioning flawlessly amidst the elements.
How Does Wind Affect Microphone Performance and How to Mitigate It?
Wind noise can markedly distort your microphone’s sound quality, making it hard to hear what’s being said. To mitigate this, use microphone protection like windshields or dead cats, which block wind noise from reaching the mic. Position your microphone carefully, ideally behind objects or away from direct wind exposure. These steps help guarantee clear audio, even in tough outdoor environments, by reducing wind noise and enhancing overall sound quality.
What Are Common Signs of Poor Audio Quality in Action Videos?
Ever notice your action videos sound off? That’s a sign of poor audio quality. You’ll hear audio distortion, where sounds seem muffled or clipped, and background noise that distracts from the main action. These issues make viewers lose focus and ruin the excitement. To avoid this, make sure your mic’s properly positioned, use windshields, and monitor audio levels. Clear sound keeps your adrenaline-pumping moments front and center!
How Can I Synchronize Audio and Video Effectively in Post-Production?
To sync audio and video effectively, start with clear sync techniques like using a clapperboard or a clap at the beginning of your clip. In post-production, focus on precise audio alignment by matching waveforms or using software features like automatic sync tools. Play back your footage to double-check the sync, making small adjustments as needed. Consistent attention to detail guarantees your audio matches perfectly with the action on screen.
Conclusion
Mastering your microphone and managing noise might seem tricky, but with the right tips, you’ll transform your action videos from muffled to magnificent. Focus on fixing flaws early, avoid ambient annoyances, and fine-tune your audio in post-production. Remember, clear, crisp sound is essential for engaging your audience and elevating your footage. So, stay savvy, stay sharp, and set yourself up for sound success in every action shot you shoot!