To place a lav mic for outdoor shoots like a pro, start by choosing a spot below the chin, close to the mouth, and hide it under clothing or accessories. Secure it with clips or tape, and aim it toward the speaker’s face for clear audio. Use windshields or dead cats to reduce wind noise, and always do a quick sound check before filming. Mastering these techniques will help you capture crisp audio even in challenging environments.
Key Takeaways
- Position the lav mic close to the mouth, typically below the chin, ensuring it remains hidden and unobstructed by clothing.
- Use windshields and wind-resistant accessories to minimize environmental noise and protect against wind interference.
- Secure the mic with clips or tie wraps, hiding it under clothing layers or accessories like collars or scarves for discretion.
- Adjust placement dynamically during the shoot to account for movement, lighting, and changing environmental conditions.
- Conduct a quick sound check before filming to verify clarity, eliminate noise, and confirm secure, effective mic placement.

eBoot 5 Pack Furry Outdoor Microphone Windscreen Muff for Most Lavalier Microphones
Color: black
As an affiliate, we earn on qualifying purchases.
As an affiliate, we earn on qualifying purchases.
Why Proper Outdoor Lav Mic Placement Matters
Proper outdoor lav mic placement is essential because it directly affects audio clarity and quality. When you place the mic correctly, your sound remains crisp, even amidst environmental noise. Creative lighting and camera angles can distract viewers, but poor mic placement ruins immersion. A well-placed mic can help you optimize audio capture and ensure your voice remains clear regardless of the setting. Accurate placement guarantees your voice stays clear, no matter the scene’s visual complexity. If the mic is too far or hidden, audio may sound muffled or distant, undermining your production’s professionalism. Conversely, positioning it too close can cause unwanted noise or distortion. By paying attention to placement, you assure your audio complements your creative lighting choices and camera angles, keeping the focus on your story. Good mic placement is the foundation for high-quality outdoor shoots that truly engage your audience. Additionally, understanding the environmental factors can help you optimize your mic positioning for the best results. Being aware of ambient noise levels allows you to adapt your placement accordingly and minimize unwanted sounds.
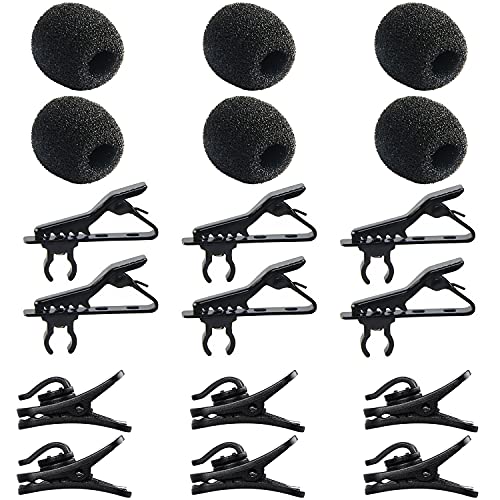
AUGSUN 18Pcs Lapel Microphone Clips Replacement Kit, 6Pcs Lavalier Mic Clips Metal Tie Clips Lavalier Microphone Clips, 6Pcs Windscreen Foam Cover and 6Pcs Plastic Wire Clips
Quantity of Package – Package includes 6pcs lavalier microphone clips, 6pcs foam windscreen covers and 6pcs lav mic…
As an affiliate, we earn on qualifying purchases.
As an affiliate, we earn on qualifying purchases.
Preparing Your Equipment for Outdoor Shooting

Before you start placing your lav mic in the field, it’s important to gather and prepare all your equipment to guarantee smooth setup and reliable performance. Make certain your microphone, batteries, and transmitter are fully charged and functioning properly. Check your windshields and clips to prevent unwanted noise, especially with creative lighting setups that might cause shadows or glare. Keep a small toolkit handy for quick adjustments. If your shoot involves makeup application, confirm the subject’s face is clean and free of powders or oils that could interfere with mic placement. Test your audio before shooting to catch any issues early. Proper preparation keeps your focus on capturing natural sound, so your outdoor shoot runs seamlessly. Additionally, understanding the importance of audio equipment can help you troubleshoot and optimize your setup for the best results. Remember that microphone placement impacts audio quality significantly, so take your time to find the optimal position.

Cubilux Furry Windscreen & Foam Cover Set for Lavalier Lapel Microphone, Muff Windshield Windjammer Deadcat, Wind Muff & Dead Cat Set for Mini Clip-On Lav MIC, 5-Pack of Each
[Package Contents] – Furry Wind Muffs and Foam Cover 5 Packs of each.
As an affiliate, we earn on qualifying purchases.
As an affiliate, we earn on qualifying purchases.
How the Outdoors Affects Lav Mic Placement
Outdoor environments introduce wind and environmental noise that can interfere with your microphone’s clarity. Your clothing and movement also affect how well the mic captures sound, especially if you’re wearing loose or noisy materials. To get the best audio, you need to carefully consider these outdoor factors when placing your lav mic. Incorporating sustainable practices can also help reduce environmental impact during your shoots. Being mindful of environmental noise can further improve your audio quality by helping you choose quieter spots or times for filming. Additionally, understanding natural soundscapes can help you select optimal locations that enhance overall audio clarity. Recognizing ambient conditions can assist in adjusting your mic placement to better suit changing outdoor circumstances.
Wind and Environmental Noise
Have you ever noticed how wind and environmental noise can suddenly ruin a good shot? When shooting outdoors, wind can overpower your lav mic’s audio, making it tough to get clear sound. To combat this, choose a microphone with good durability against harsh conditions, guaranteeing it withstands wind and debris. Consider using windshields or dead cats to reduce noise interference. Keep in mind, environmental factors can also impact your mic’s battery life, especially if it’s exposed to extreme temperatures or moisture. Regularly check your equipment’s battery levels and choose mics designed for outdoor use to prevent unexpected failures. Proper placement and protective gear help ensure your audio stays clean, while your gear remains functional throughout your shoot. Additionally, understanding the fundamentals of microphone durability can help you select equipment that performs reliably in outdoor conditions. Being aware of environmental factors that influence your gear’s performance can further improve your shooting outcomes. For example, selecting mics with weather-resistant features can significantly enhance reliability during long outdoor shoots.
Clothing and Movement Effects
Clothing and movement can considerably affect your lav mic’s audio quality during outdoor shoots. Loose or flowing fashion trends, like scarves or jewelry, can cause rustling sounds or microphone noise. Sudden movements, such as gesturing or turning quickly, can shift the mic’s position or create noise. Weather considerations also play a role—windy conditions or rain can impact how you wear your mic and clothing. To minimize issues, choose tight-fitting clothing that stays in place and avoid accessories that cause noise. Being aware of your clothing choices can help you better manage mic placement and reduce unwanted sounds. Here’s a quick reference:
| Clothing Type | Effect on Mic | Tips |
|---|---|---|
| Loose fabrics | Noise, rustling | Use clip-on mics tightly secured |
| Jewelry | Clinking, rustling | Remove or minimize jewelry |
| Weather Gear | Shifting, noise | Secure clothing layers tightly |
| Fashion Trends | Movement impact | Adapt placements for flowy fabrics |

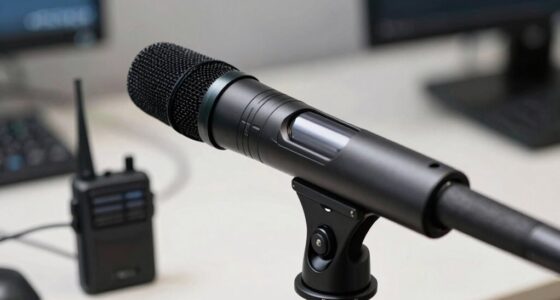
Movo XLR Shotgun Microphone & Boom Pole Kit – Professional Location Sound Recording Bundle with Shotgun Mic and Boompole with Internal XLR Cable for Filmmaking, ENG, and Broadcast Audio
BOOM MICROPHONE FOR FILMING: Capture broadcast-quality sound for your films, documentaries, and YouTube videos with this professional XLR…
As an affiliate, we earn on qualifying purchases.
As an affiliate, we earn on qualifying purchases.
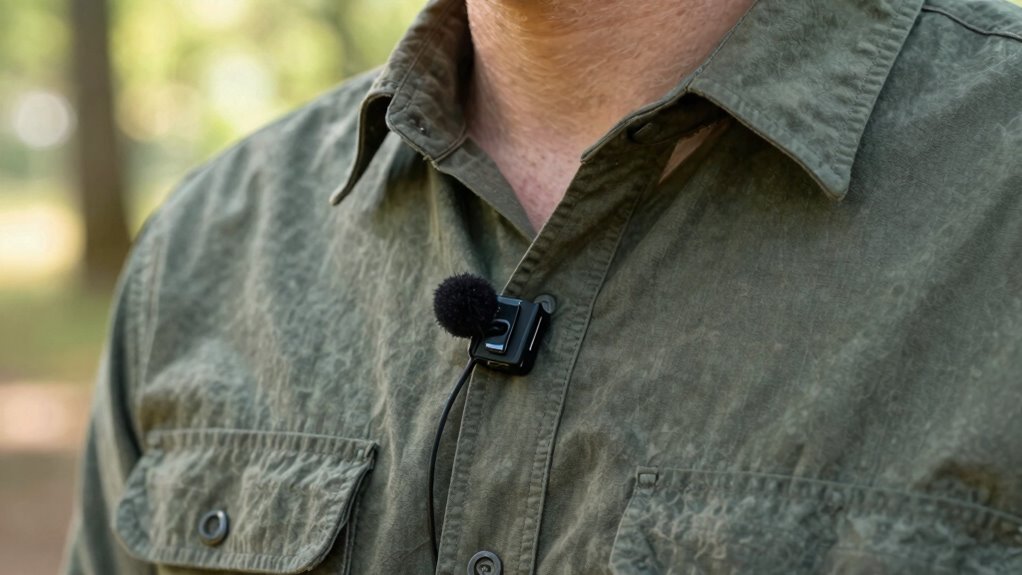
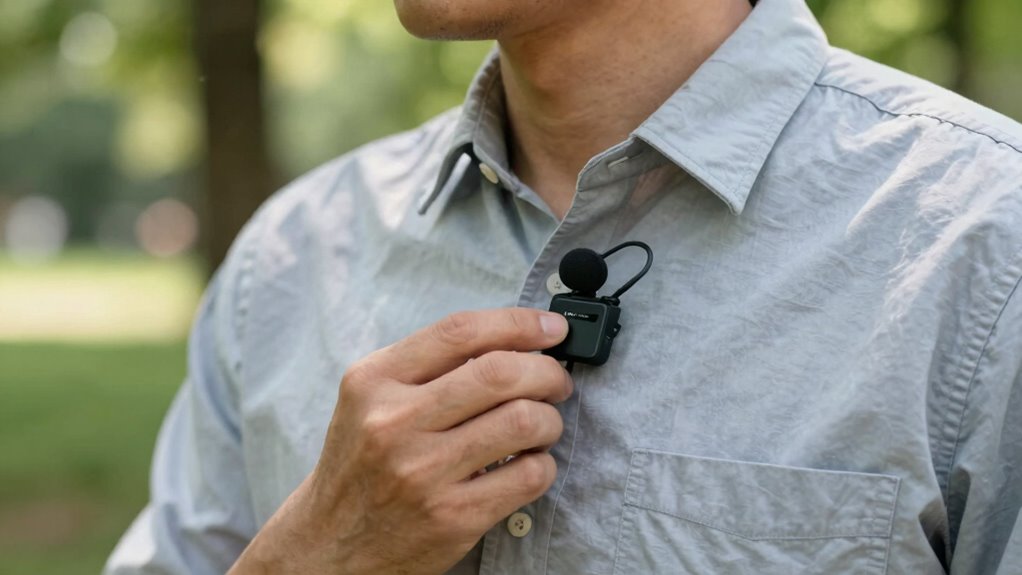
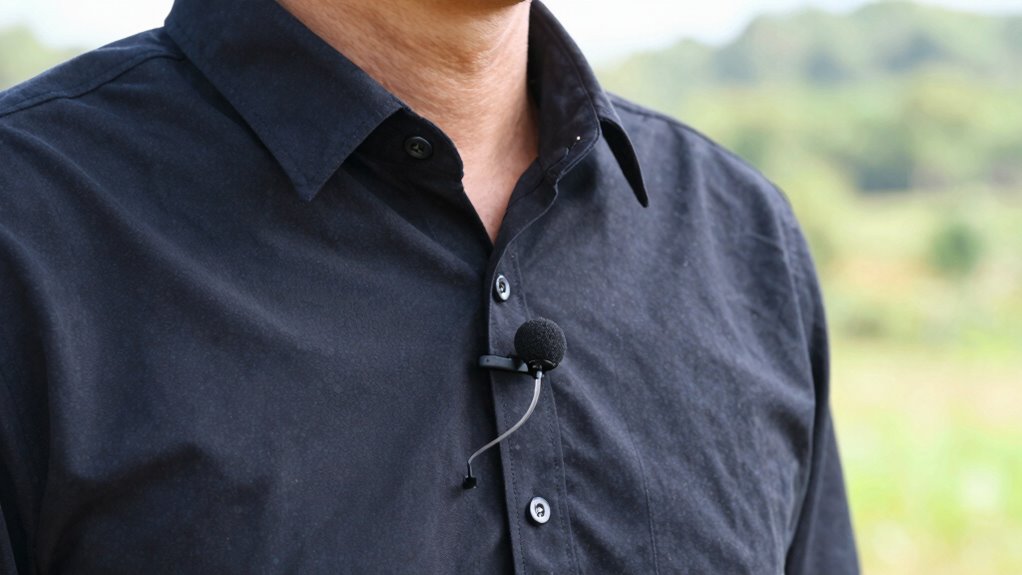
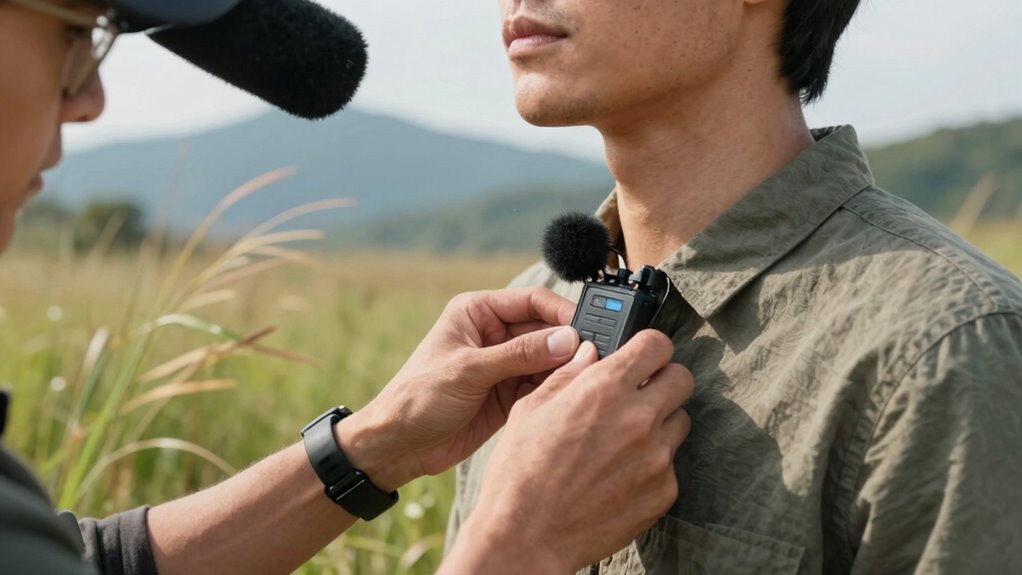
Choosing the Best Spot on Your Subject’s Body
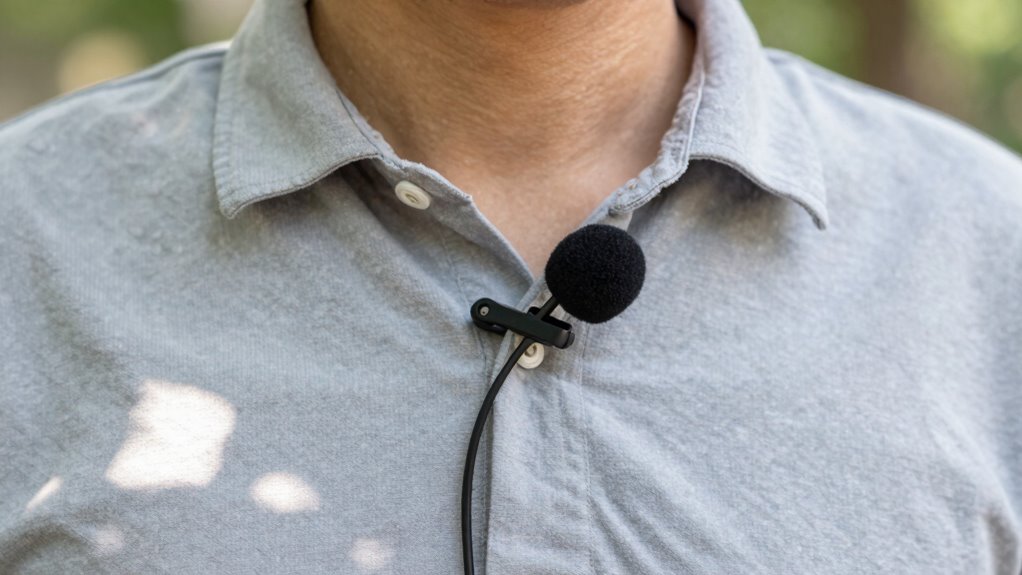
Choosing the right spot on your subject’s body is crucial for capturing clear, natural sound. The best placement often depends on the subject’s clothing and activity. Typically, placing the lav mic about 6-8 inches below the collarbone works well, especially if the subject wears a shirt or jacket. Use lav mic accessories like clothing clips to secure the mic discreetly and prevent movement noise. Avoid placing the mic directly on thick or noisy fabric, as it can muffled or distort audio. For outdoor shoots, consider how the subject moves—if they’re active, position the mic where it won’t shift or get exposed to wind. The goal is to find a spot that’s close enough for good sound but hidden enough not to distract from the shot. Additionally, understanding sound quality and how it varies with placement can help you achieve more professional results. Being aware of wind noise and using windshields or positioning can further improve audio clarity in outdoor environments. Proper microphone placement is also essential for minimizing background noise, ensuring your recordings are crisp and focused. Moreover, testing different placements before filming can help you identify the optimal spot for consistent audio performance. Remember that the sound environment can also influence your placement choices, especially in unpredictable outdoor settings.
Positioning Your Lav Mic for Clearer Sound
To guarantee your lav mic captures the best possible sound, proper positioning is key. First, place the mic close to the subject’s mouth, typically about 6-8 inches below the chin, ensuring it’s not obstructed by clothing or accessories. Second, consider your lighting techniques; avoid placing the mic where shadows or bright light might cause interference or noise. Third, think about camera angles—position the mic so it’s hidden from view but still directly captures speech, especially when shooting from low or high angles. Keep the mic oriented toward the mouth, and test different placements for clarity. Additionally, understanding the importance of regional culture can help you choose the best outdoor locations that naturally provide good acoustics and scenery. Being aware of natural sound environments can also assist in selecting optimal spots that enhance overall audio quality. Recognizing how ambient noise impacts sound clarity can further improve your mic placement choices during outdoor shoots. This strategic positioning helps minimize wind noise and ambient sounds, resulting in cleaner, more professional audio during outdoor shoots. Being mindful of external factors such as weather conditions and environmental sounds can also help optimize your microphone placement for better clarity. Paying attention to surrounding sounds can reveal unexpected sources of noise that may require repositioning your mic for optimal results.
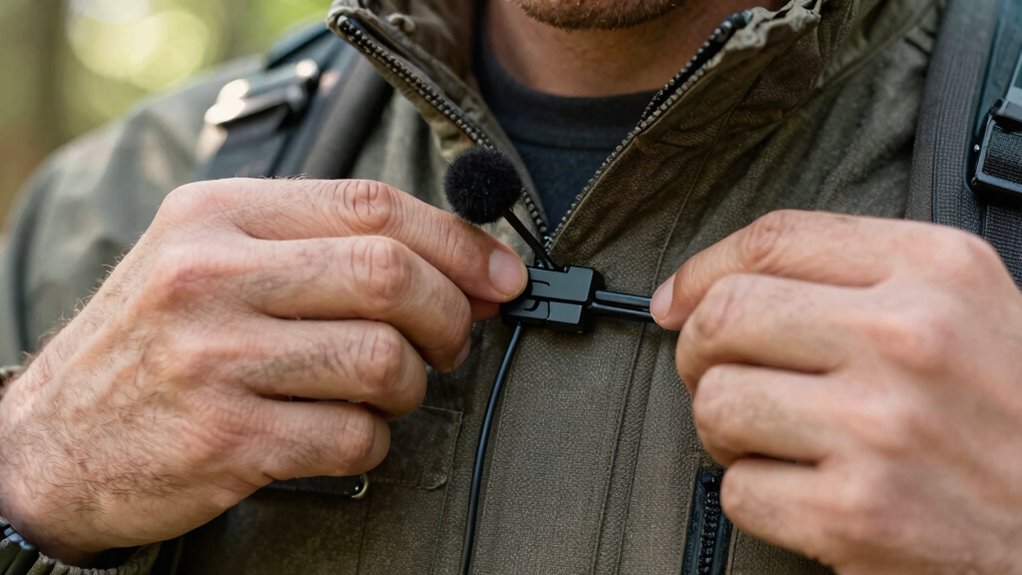
Concealing Your Lav Mic Without Sacrificing Quality
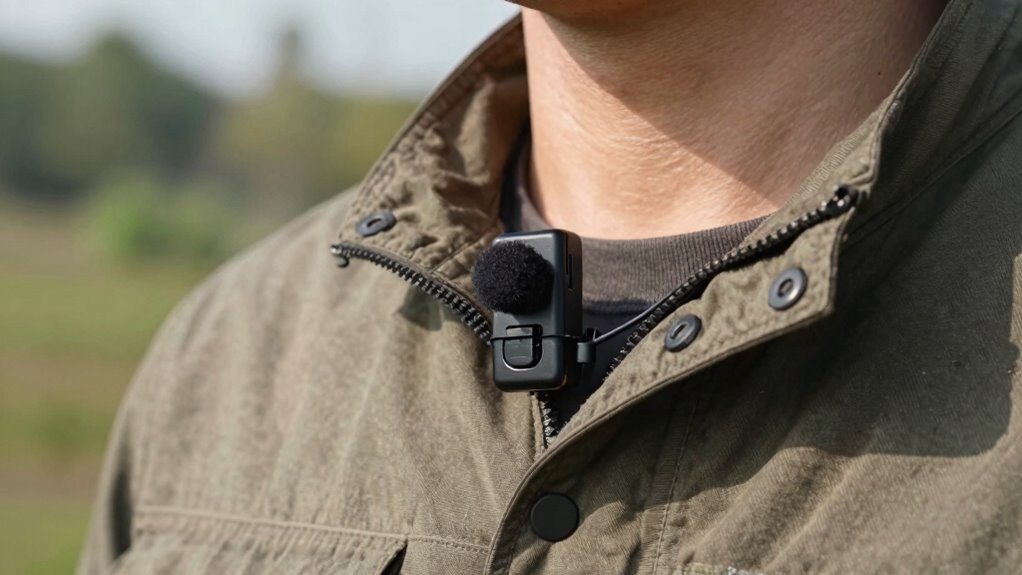
To keep your lav mic hidden without losing sound quality, choose clothing placements that naturally conceal the mic, like inside a collar or beneath a shirt. Use accessories such as lapel clips or tie wraps to secure the mic discreetly and reduce movement noise. Make sure your setup allows for clear sound capture by testing before filming, so your audio remains crisp and undetectable. Incorporating AI-powered noise reduction tools can further enhance audio clarity during post-production. Additionally, understanding narrative flow can help you position the mic in spots that best suit your shot composition without compromising audio quality.
Choosing Discreet Clothing Placement
Since outdoor environments often demand a discreet setup, your goal is to hide the lav mic without sacrificing audio quality. Your clothing choices play an essential role here. First, select fabrics with some texture or layers, like jackets or shirts with collars, to naturally conceal the mic. Second, consider camera angles; position the mic where it’s less likely to be visible, such as under a scarf or collar. Third, opt for clothing with hidden seams or pockets, allowing you to place the lav discreetly without sacrificing sound. Avoid tight or shiny fabrics that can reflect or reveal the mic. By balancing fashion choices with camera angles, you guarantee the mic stays hidden while capturing clear audio.
Using Proper Clothing Accessories
Using the right clothing accessories can make a significant difference in concealing your lav mic effectively. Incorporate fashion trends like lightweight scarves, discreet lapel pins, or fabric tape to hide the mic without drawing attention. These accessories help keep the mic close to your body, maintaining ideal sound quality while blending seamlessly with your outfit. Pay attention to camera angles; for instance, avoid accessories that might catch light or create unwanted shadows. Layering with stylish, functional items like button-up shirts or jackets can also hide the mic beneath fabric folds. By choosing accessories that match your wardrobe and current trends, you guarantee your mic remains hidden without sacrificing the look or audio clarity, making your outdoor shoot appear natural and professional.
Ensuring Clear Sound Capture
Achieving clear sound while keeping your lav mic hidden requires strategic placement and careful handling. To prevent audio issues, consider these steps:
- Choose the right camera angle: Position the mic close to the mouth, ideally on the chest or collar, ensuring it stays hidden but captures sound directly.
- Use effective lighting techniques: Avoid shadows or reflections that might reveal the mic. Proper lighting helps conceal the mic’s placement, especially if you hide it under clothing or accessories.
- Adjust mic placement: Test different spots, like behind the lapel or beneath the shirt collar, to find a balance between concealment and sound clarity. Consistent camera angles and lighting ensure your mic remains discreet without sacrificing audio quality.
Managing Wind and Noise During Outdoor Shoots
Wind and ambient noise can quickly undermine the clarity of your audio during outdoor shoots, making it essential to take proactive steps to manage these elements. Use windshields or foam covers on your lav mic to minimize wind noise, and position the mic close to the speaker’s mouth. When capturing drone footage, be aware that the drone’s noise can interfere with audio, so consider recording ambient sound separately or using directional microphones to isolate speech. Lighting considerations also matter—shooting during times with softer, diffused light reduces the need for additional equipment that could add clutter or noise. Monitoring audio constantly helps catch issues early, ensuring your sound quality remains clear despite the outdoor environment’s challenges.
Real-Time Tips for Adjusting Lav Mic Placement
Keep a close eye on your audio levels as you shoot, making quick adjustments if they spike or drop. If wind causes interference, reposition the mic or add a windscreen to improve sound quality. Continuously optimize the mic placement to guarantee clear, natural audio without unwanted noise.
Monitor Audio Levels Constantly
Since ambient noise and movement can vary quickly during outdoor shoots, it’s essential to monitor your audio levels constantly. As you adjust camera angles and lighting setups, keep an eye on your audio meters to catch issues early. To do this effectively:
- Regularly check your audio levels on the recorder or camera display, ensuring they stay within a suitable range.
- Listen with headphones during takes to catch subtle background noises or distortions.
- Be ready to make quick adjustments—like repositioning the lav mic or changing orientation—to maintain consistent sound quality.
Adjust for Wind Interference
When you’re filming outdoors, unexpected gusts can quickly introduce wind noise that disrupts your audio quality. To combat this, adjust your lav mic’s placement—try to keep it close to the speaker’s mouth and shield it from direct wind. Use windshields or foam covers with UV protection to minimize wind interference and protect against sun damage. Be mindful of insect interference, which can cause rustling sounds; positioning the mic slightly higher or behind clothing can help. If wind picks up suddenly, temporarily move the mic under clothing or behind a barrier. Constantly monitor audio levels and make quick adjustments as needed. These real-time tweaks can markedly improve sound clarity, ensuring your outdoor shoot sounds professional despite unpredictable conditions.
Optimize Microphone Position
Adjusting your lav mic in real-time is essential for capturing clear audio during outdoor shoots. To optimize its position, consider how your lighting setup and camera angles influence sound quality. First, verify the mic is close enough to the speaker’s mouth, but hidden from view and away from clothing rustles. Second, adapt the mic’s placement based on lighting; for instance, if the sun creates shadows, shift the mic slightly for better proximity. Third, change the mic angle if your camera angle shifts, ensuring the mic stays pointed toward the mouth. These adjustments help maintain consistent audio quality, regardless of changing lighting or camera positions, making your sound smooth and professional even in dynamic outdoor environments.
Accessories to Enhance Outdoor Lav Mic Sound and Placement

Using the right accessories can substantially improve the sound quality and placement of your outdoor lav mic. Windshields or dead cats are essential for reducing wind noise, ensuring clear audio even in breezy conditions. Clipping accessories like lav mic clips or tie clips help secure the microphone in the ideal position, making it easier to hide and maintain consistent sound pickup. To complement your camera angles and creative lighting, consider discreet mounting options, such as adhesive mounts or miniature booms, to keep the mic close without cluttering your shot. These accessories help you adapt to different environments and shot styles, giving you more control over audio quality. Properly equipped, you’ll maintain professional sound, regardless of the outdoor challenges you face.
Final Checks Before Recording Outdoors

Before hitting record, taking a few final steps can make a big difference in capturing clean, professional audio. First, double-check your lav mic placement, verifying it’s secure and hidden from lighting techniques that could cause glare or shadows. Next, review your camera angles to confirm the subject’s face is well-lit and the mic isn’t visible, preventing unwanted noise or visual distractions. Finally, do a quick sound check to catch any background noise or interference, adjusting your positioning if needed. Confirm that your equipment is powered and connected correctly. These steps ensure ideal audio quality and visual composition, giving you confidence that your outdoor shoot will look sharp and sound professional—no surprises when you hit record.
Frequently Asked Questions
How Do I Prevent My Lav Mic From Falling off During Outdoor Movement?
To prevent your lav mic from falling off during outdoor movement, use secure mounting techniques like double-sided tape or a windscreen clip. Attach the mic to clothing in a discreet spot, such as inside a collar or under a shirt, ensuring it’s hidden for good clothing concealment. Tighten the clip firmly but gently, and consider using a lavalier holder or adhesive if necessary. This keeps your mic stable and hidden during active shoots.
What Type of Clothing Is Best for Concealing a Lav Mic?
Like a master of disguise, the right clothing can make your lav mic vanish. Opt for clothing with tight, smooth fabric choices, such as fitted shirts or blouses made of cotton or spandex blends. Avoid bulky or textured fabrics, which can create noise or reveal the mic. Concealing your lav mic becomes seamless when you choose clothing that hugs your body and minimizes movement, keeping your sound crisp and invisible.
How Can I Tell if My Lav Mic Is Picking up Wind Noise?
You can tell if your lav mic is picking up wind noise by listening for static or rustling sounds during playback, especially when it’s windy. Check your recordings closely and pay attention to any muffled or distorted audio. Proper microphone placement helps decrease wind noise; place the mic close to the subject’s body and use windshields or dead cats. Adjusting placement and adding wind protection guarantees clearer sound and minimizes wind interference.
Should I Use a Windscreen on My Lav Mic Outdoors?
Did you know that using a windscreen can reduce wind noise by up to 80%? Absolutely, you should use a windscreen on your lav mic outdoors. It improves microphone placement and enhances wind resistance, ensuring clearer audio. Without it, wind can cause harsh, unwanted noise, making your recordings difficult to understand. So, always attach a windscreen when filming outside to protect your audio quality and maintain professional results.
How Do I Troubleshoot Audio Issues Caused by Outdoor Environmental Factors?
To troubleshoot outdoor audio issues, start by checking for audio signal interference from nearby electronic devices or metal structures, which can disrupt your sound. If you experience wireless connectivity issues, try switching channels or frequencies on your transmitter and receiver. Make certain your batteries are fresh, and keep your transmitter close to the receiver. Using a windscreen also helps minimize environmental noise, improving overall audio clarity during outdoor shoots.
Conclusion
So, next time you’re outdoors, remember that perfect mic placement isn’t just about luck — it’s about knowing exactly where to hide it, tame the wind, and catch every word. Ironically, the more you plan and adjust, the less anyone notices your effort. So go ahead, make it look effortless. After all, if your sound’s crystal clear, nobody will ever suspect you actually know what you’re doing.